How to Contribute to PVLIB
 Figure 1: PVLIB
Introduction
If you are not familiar with Git and Github it might be a daunting task to contritube code to pvlib. This is a step-by-step guide that should help. Please note there are many different ways of interacting with software repositories and the best way to do something may change depending on the open source project maintainers, the context of the code itself, or the team that you work in. This workflow I believe is reasonable for a change like the one that I present, but may not work well for all types of changes.
Definitions
- Repository: A storage location for all of the code in a software project
- Github: An online file system and version control website.
- Git: A desktop command line tool for interacting with online file systems
- Fork: A copy of an existing software project with a different main owner.
- Integrated Development Environment (IDE): A software application which makes software development easier by integrating many different functionalities into one application.
Things you should know before embarking
- Python: Pvlib is a python software project.
- Pandas: Pvlib makes heavy use of the pandas library.
- Pvlib Contribution Page: https://pvlib-python.readthedocs.io/en/stable/contributing.html
- Flake8: Pvlib uses the PEP8 style for code formatting. I like to have an automatic check to make sure my code fits whichever formatting style the project I am contributing to likes. In this case I use the Flake8 extension which you can add to VSCode (my integrated development environment (IDE)) via extension.
Github Account
First you need to make an account on Github. Github is an online code respository that stores software projects in the cloud. There are many alternatives to Github which is owned by Microsoft, for example Azure Devops, also owned by Microsoft, Atlassian’s Bitbucket, Gitlab, Gitea, etc. but most of the open source community has landed on Github as the defacto standard for managing software repositories.
“Forking” pvlib
Once you have an account on github, you will want to create a fork for the pvlib respository. A fork is a copy of an existing project with a different main owner. We will be forking pvlib (owned by the maintainers) in order to create a special version of pvlib owned by us.
- Go to the pvlib github repository: https://github.com/pvlib/pvlib-python
- Click on this fork button

- Click on the green “Create fork button”
- You should now have a forked version of pvlib inside of your own personal github account.

- Next you are going to want to to “Clone” this fork of pvlib to your local computer. Copy the https url to your clipboard.
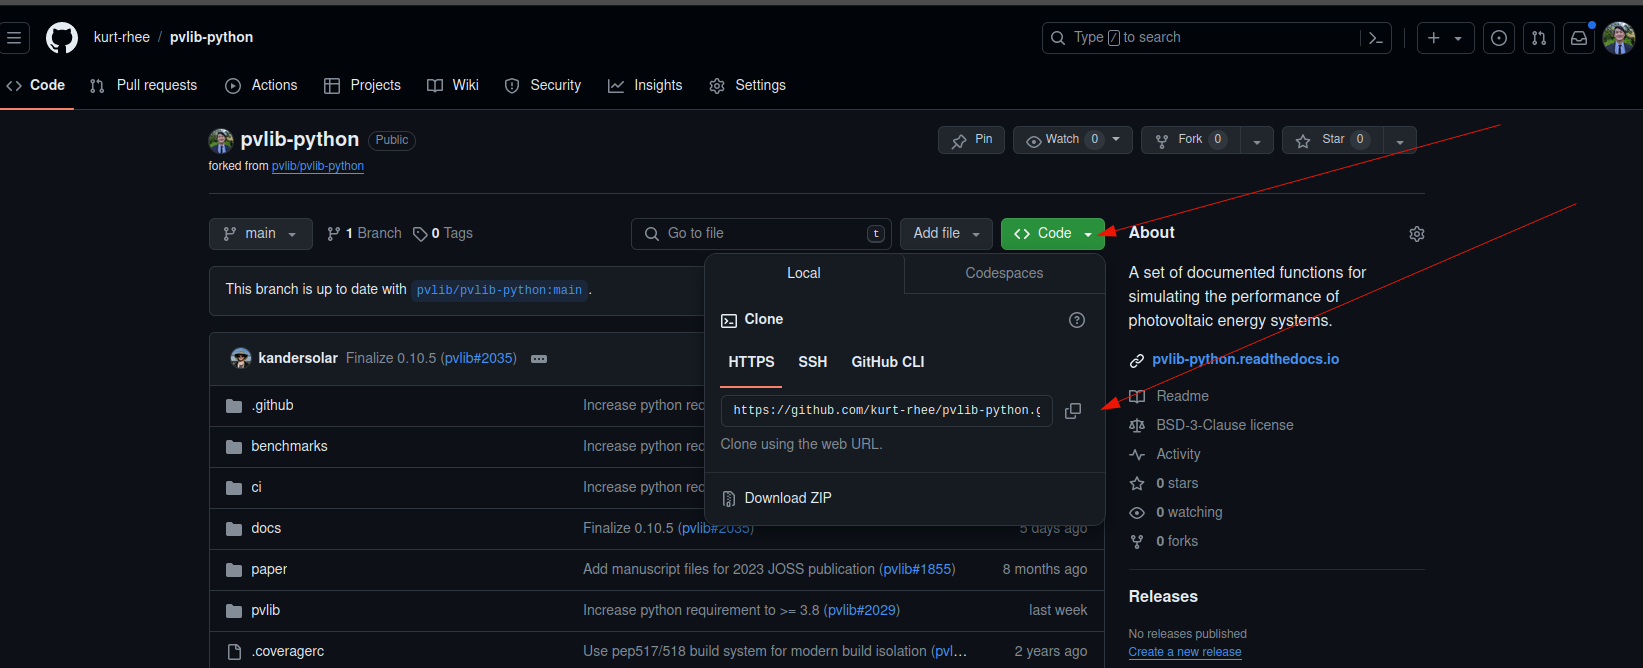
- I like to use my terminal for this task. First navigate to the folder where you want your local copy of pvlib to live and then type the following command.

- You should see the following text appear inside of your terminal
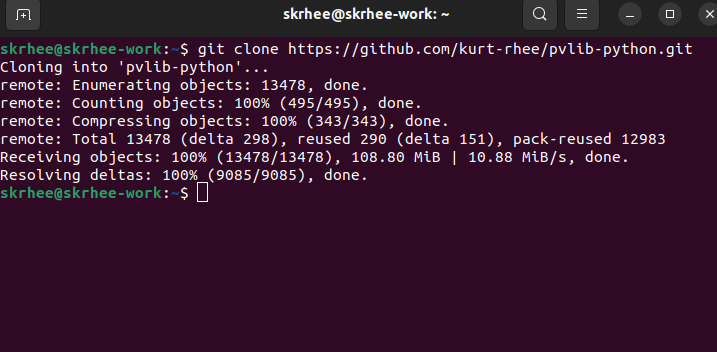
If it wasn’t succesful, you might not have git installed yet. If that is the case, you can download it here: https://git-scm.com/
Did all that feel like magic to you? Check out Mark Mikofski’s talk for the Data Analysis Tools Series at the Berkeley Institude for Data Science here: https://bids.github.io/dats/posts/2018-09-10-github-oss.html
Creating a new function in pvlib
Once you have a copy of pvlib on your computer you will want to open it up in an Integrated Development Environment (IDE). I personally use VSCode since I also work in other programming language such as Rust and C#, but alternatives like Pycharm should work fine as well. You could also do this entire workflow using github desktop, or the github command line interface (CLI). I won’t discuss those workflows here, but feel free to use whichever workflow feels most productive for you.
Let’s create a new .py file which will hold our new function inside of the pvlib/pvlib folder where all of the rest of the functions are. Notice in the screenshot below that the pvlib folder has turned green and the transformer.py file has been created. Also notice that the git symbol (the branching graph) has incremented to 1 since we have made changes to 1 file.
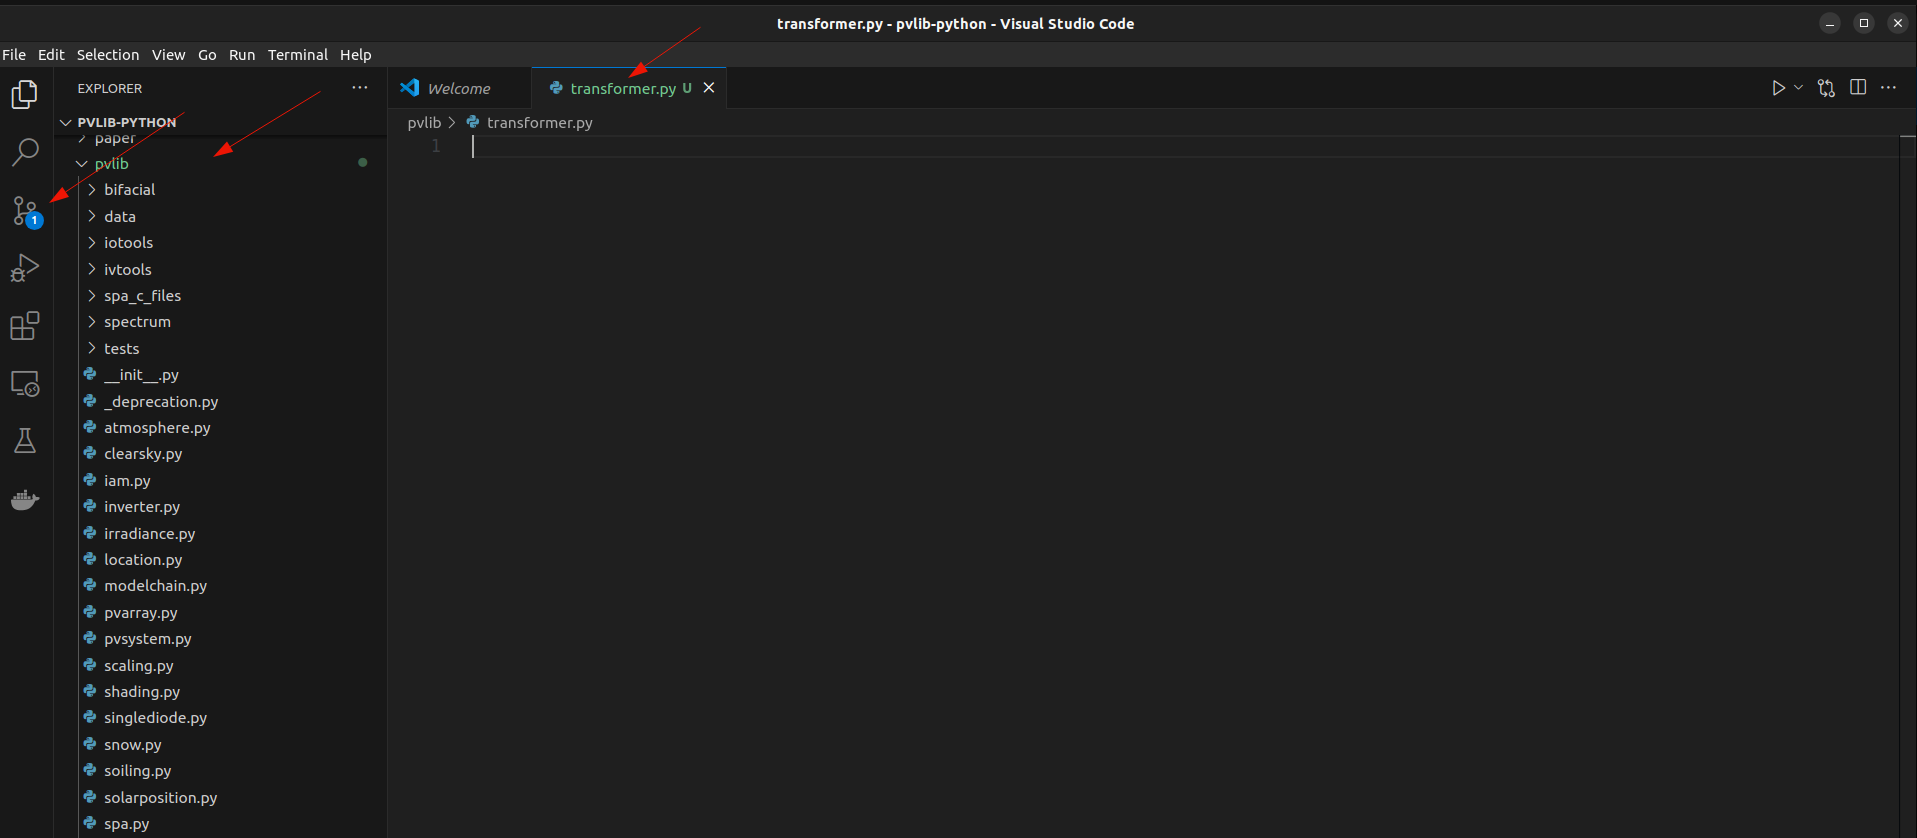
- And write our function in this file, while making sure to adopt the project’s conventions for docstrings, imports, etc.

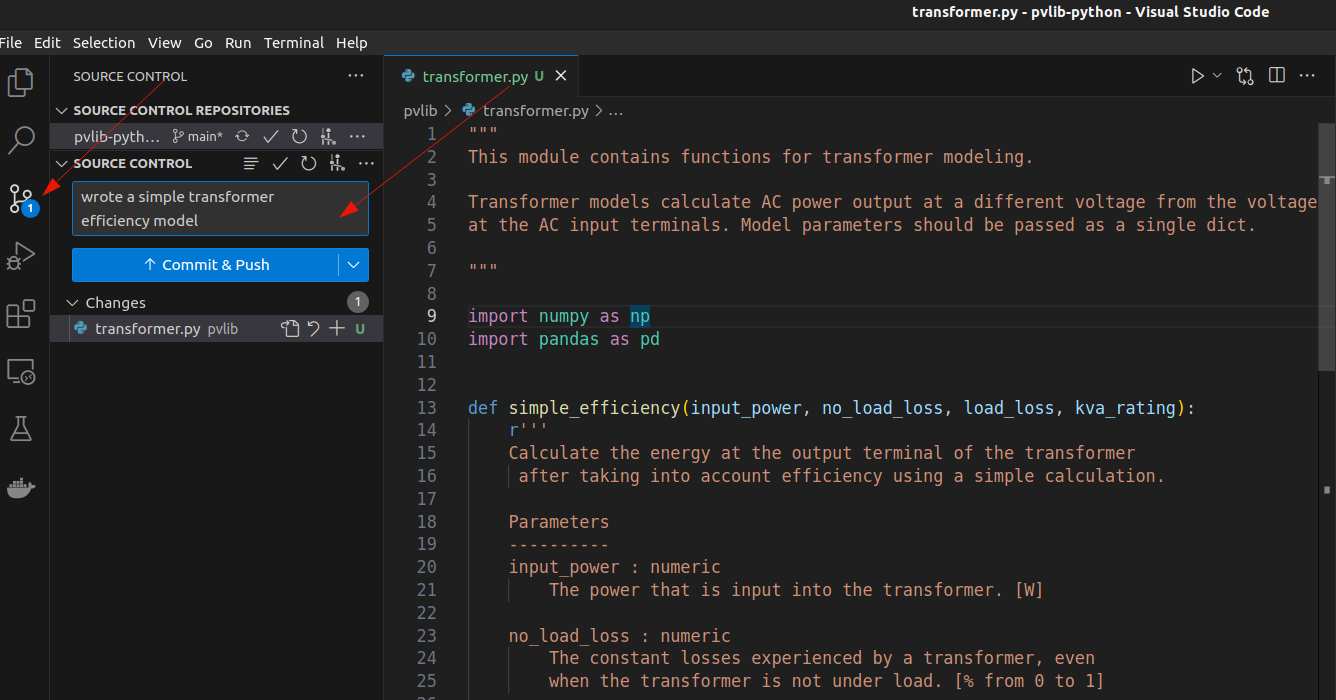
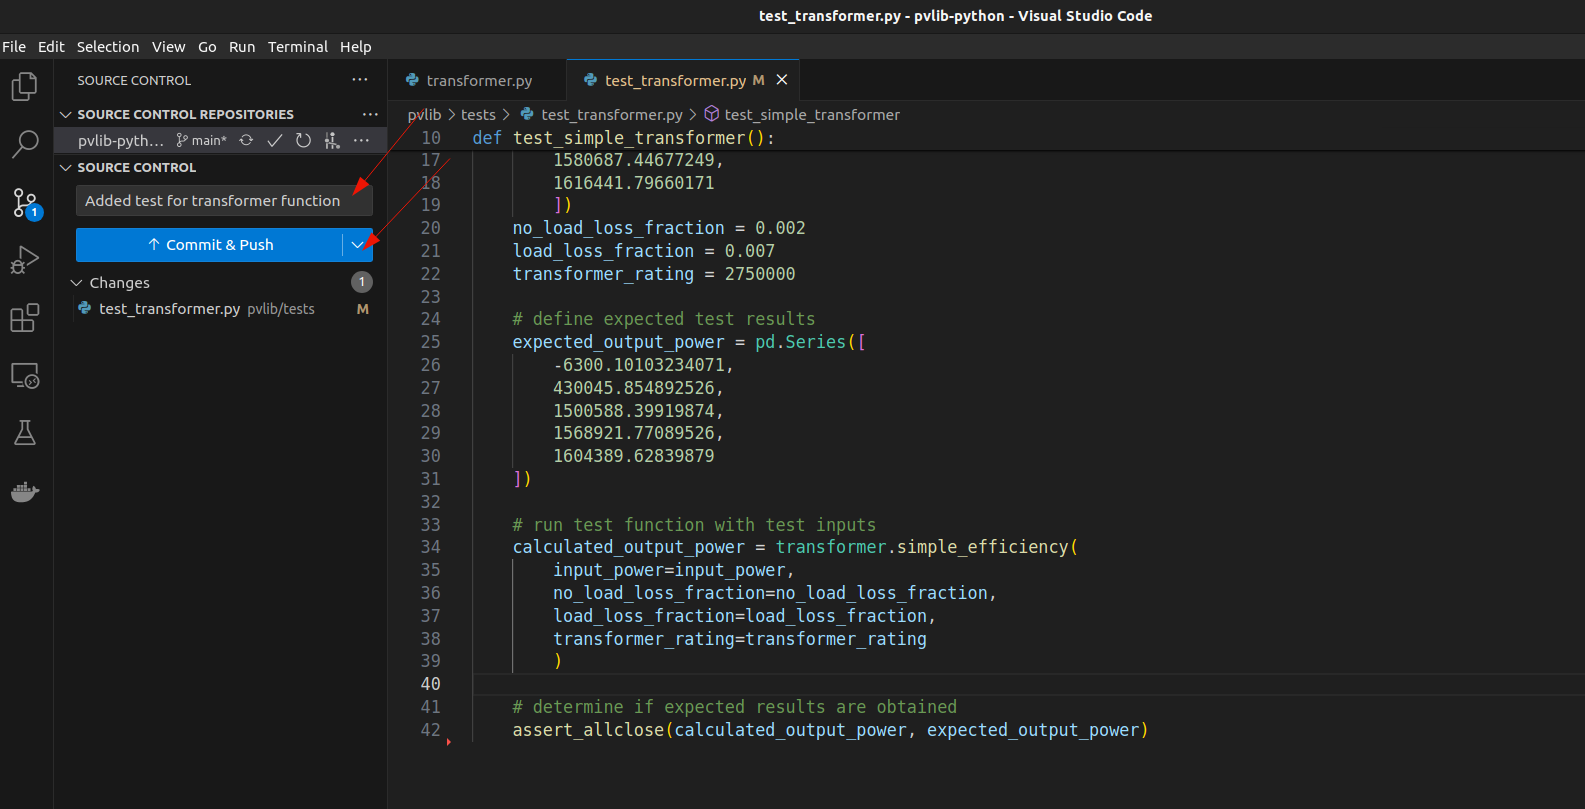
- Let’s make a commit by clicking on the source control tab and then writing a commit message. A commit is a revision of your project which stays frozen in time. A commit message will help you remember what you did in that revision. Once you have written your commit message you can hit “Commit and Push” to send this revision to be stored within Github.
- I have a VSCode extension installed called gitgraph which shows you graphically the revision history of my projects. In this case I have created revision 43234fc3.

Writing a test for the function
- Next lets create a test for our new function. I am using inputs and outputs from a well known performance modeling software in order to make sure that the function that I wrote is correct.
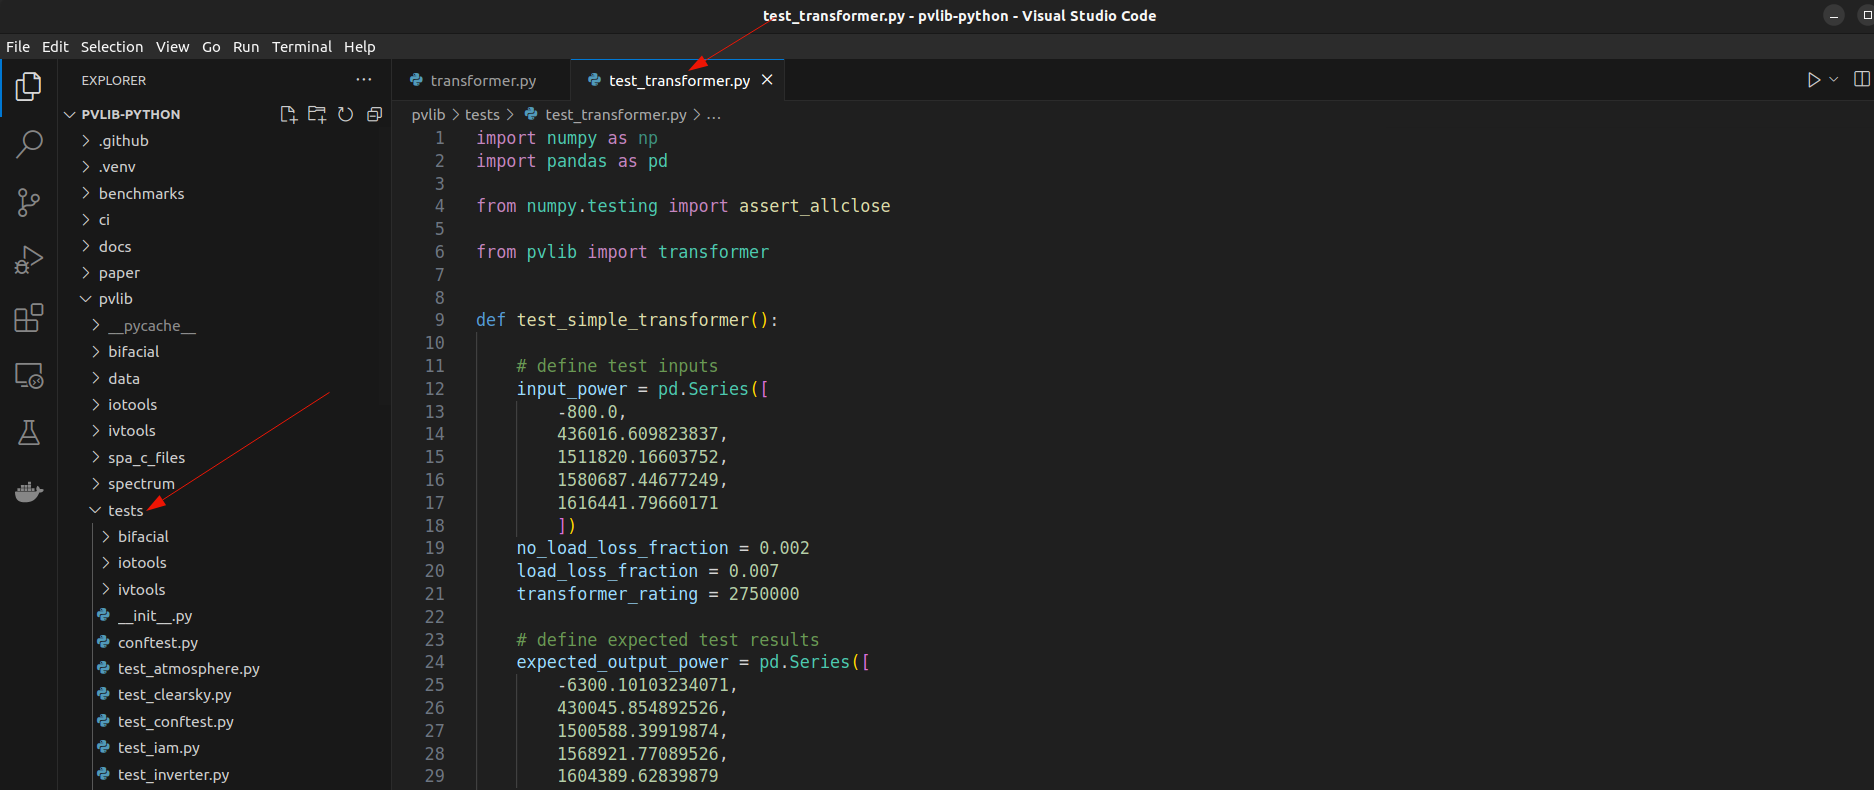
- Lets commit the changes just like we did for the transformer.py file. Don’t forget to add a descriptive message.
Creating a Pull Request (PR)
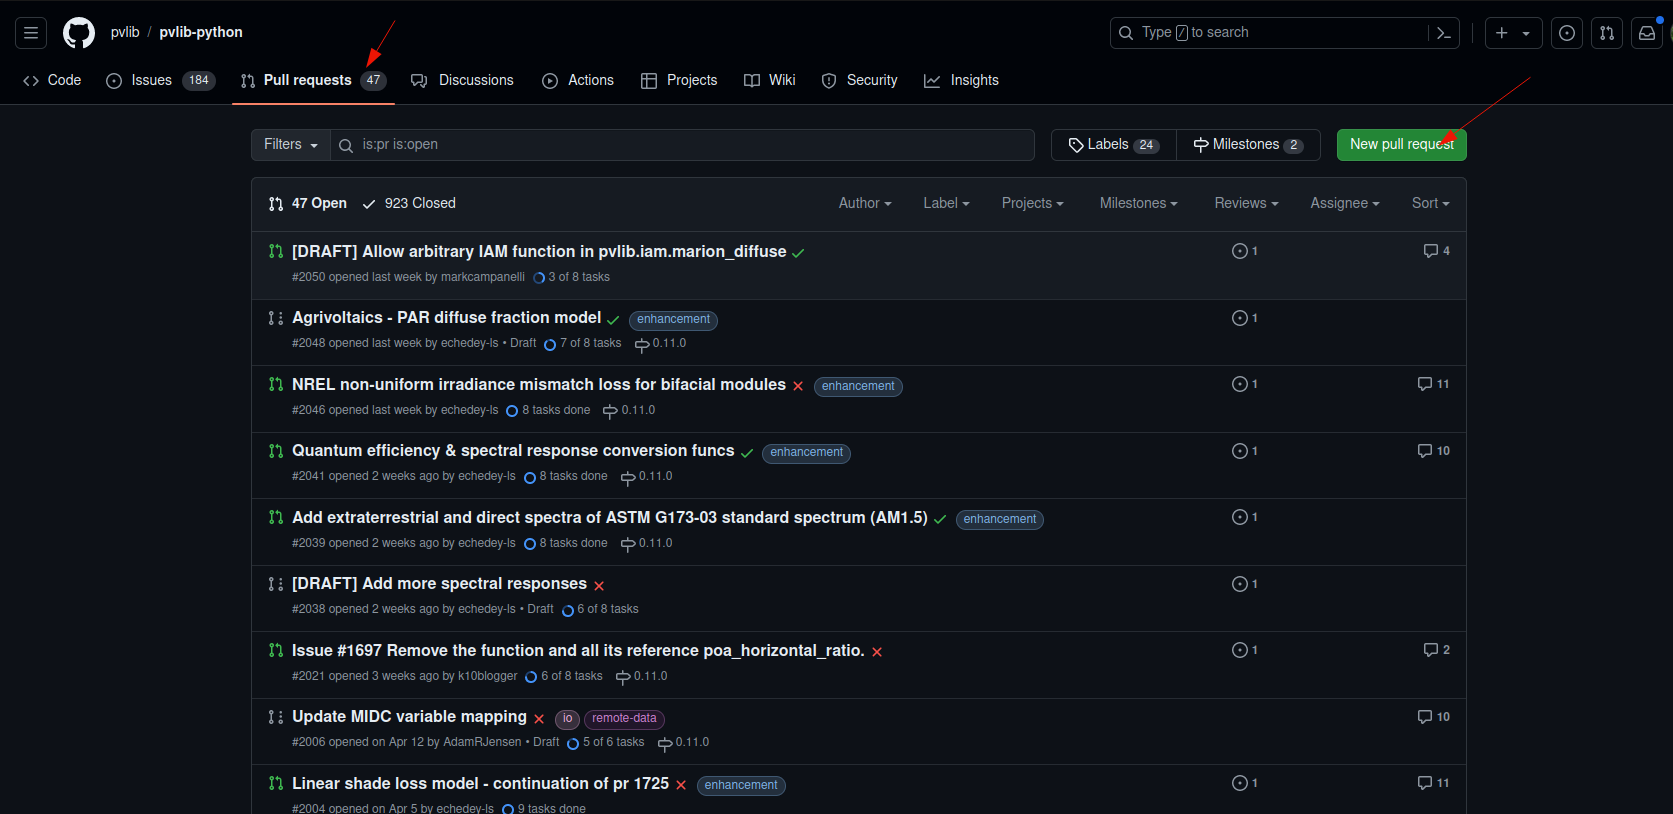
- A pull request is a request for the maintainers to take a look at your code and maybe pull that code into the main branch. Click on “Pull requests” and then click on the green “New pull request” button.
- Now click on the blue, underlined “compare across forks” links so that we can include our fork in the list of places that Github will search for pvlib code to pull. Then click on the green “Create pull request” button.
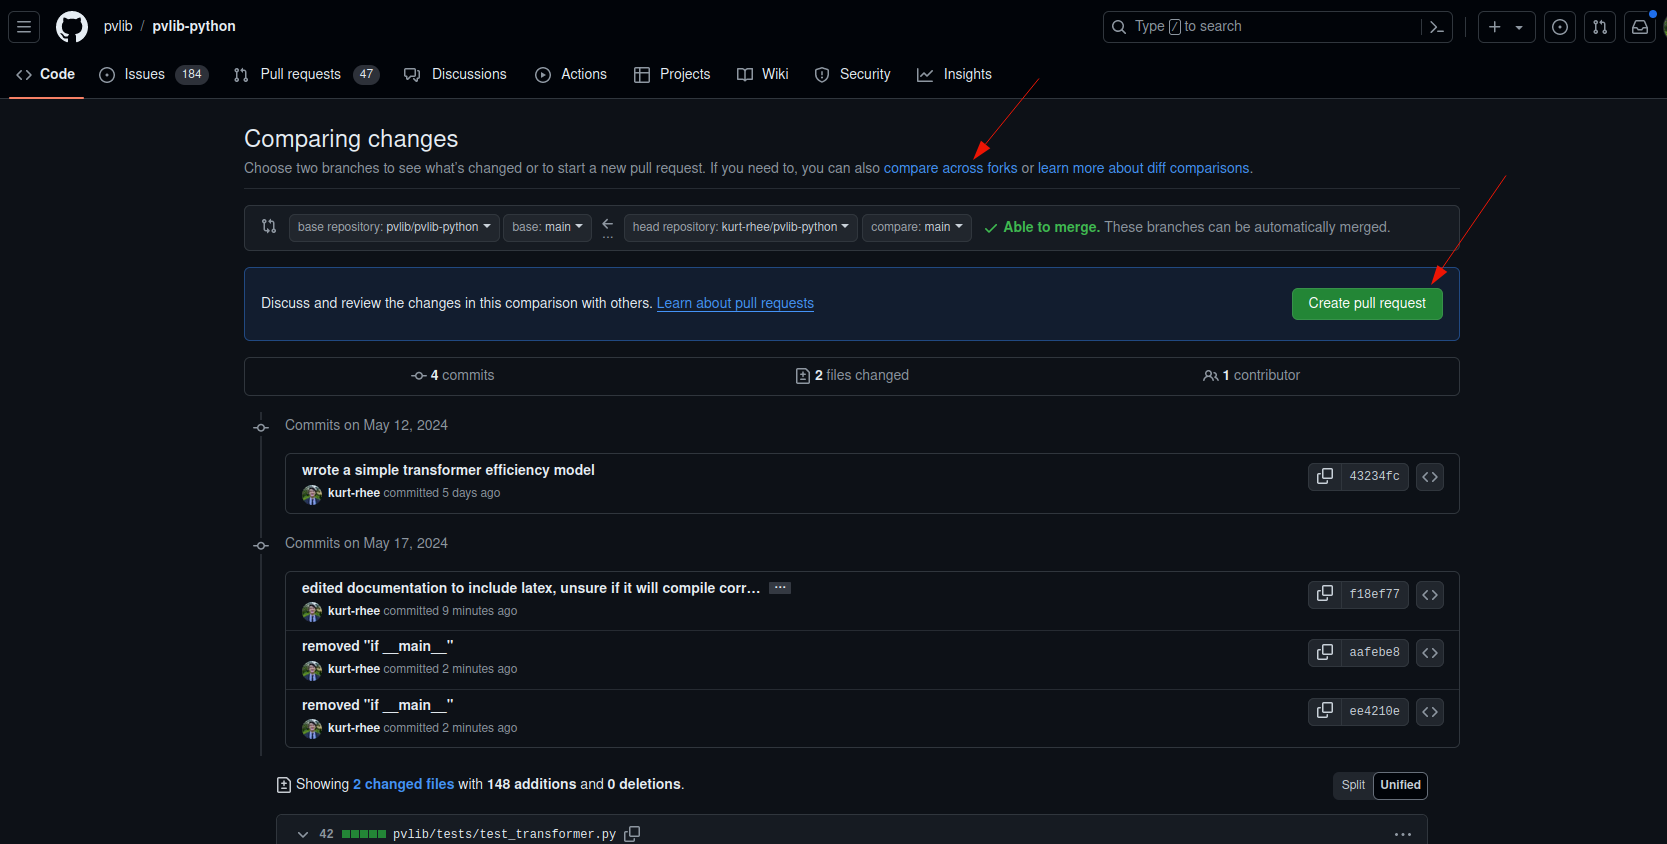
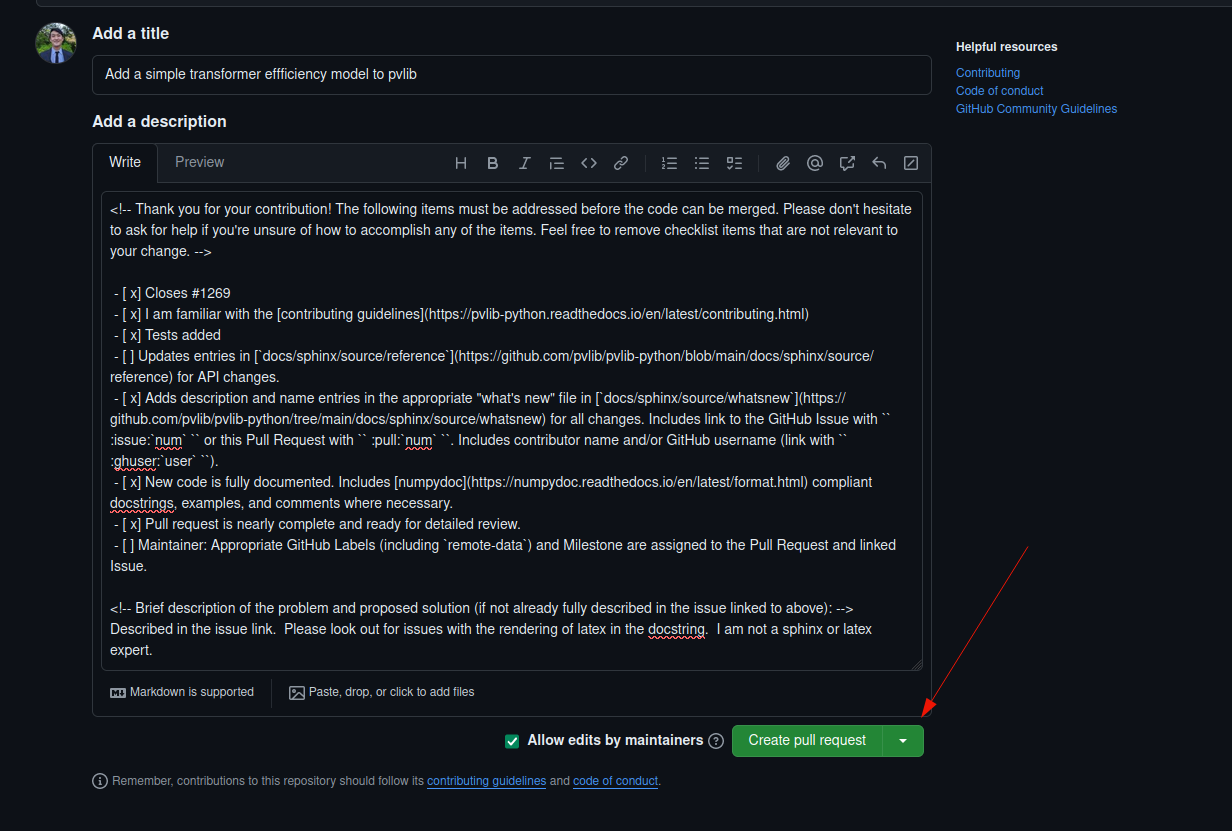
- There are a list of instruction in the pull request description. Follow them and then hit “Create pull request” at the bottom of the screen.
Waiting for Comments
Now all you have to do is wait for comments from the maintainers. In software development, PR’s are a chance to catch mistakes, give guidance, and also discuss. I like to think of it as free education from some of the best performance modelers in the industry.
Once all of the necessary edits are made, the maintainers will merge the PR into the PVLIB main branch and your code will become a part of the library for everyone to use!